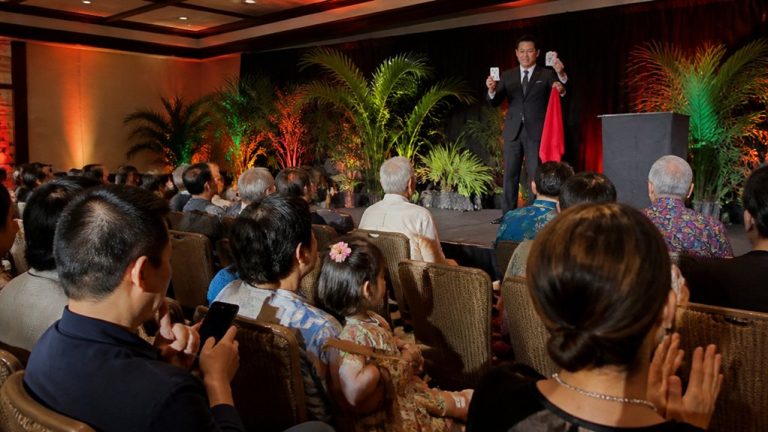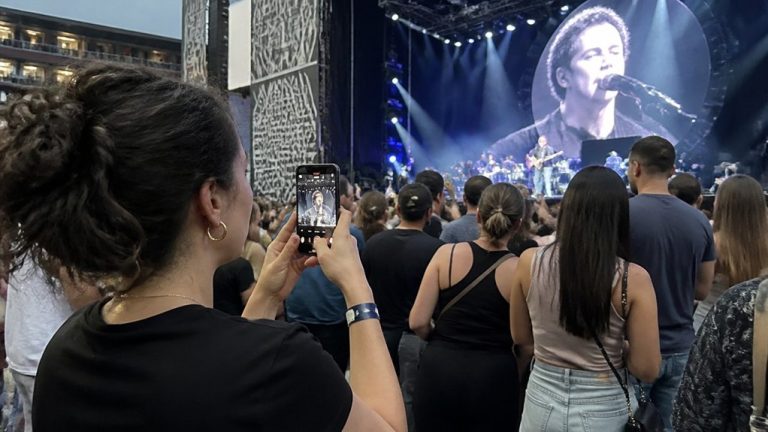

When the lights drop and the bass starts to thump, your phone becomes either a keen-eyed night owl or a blurry tourist. You’ll get better low-light show photos if you use the main lens, switch to Pro or RAW, and tame ISO, shutter speed, and shaky hands before the first chorus hits. A few smart changes can keep neon glow, smoky air, and bright faces intact, but one setting still makes or breaks the shot.
Key Takeaways
- Use the phone’s main 1x lens and shoot RAW/DNG for cleaner low-light detail, better color, and stronger highlight and shadow recovery.
- Start in Pro mode with ISO 400–800, then adjust based on venue brightness and how much motion you need to freeze.
- Use 1/125–1/250s for performers, 1/250–1/500s for fast action, and 1/4–2s only for still scenes on support.
- Underexpose slightly, about -0.3 to -1.0 EV, to protect faces and stage lights from blown highlights.
- Lock focus and white balance, brace the phone or use a tripod, and use Night Mode for quick handheld static shots.

Oahu Circle Island Snorkeling Tour: Dole, Pali Lookout & More
Looking for the BEST VALUE & MOST COMPLETE Circle Island Snorkeling Tour? Join us for the ultimate full-day, action-packed adventure that will guide y...

Oahu: Submarine Scooter Adventure
Dive into an unforgettable underwater adventure on Oahu’s beautiful Maunalua Bay. Cruise past the iconic Diamond H...

Toa Luau at Waimea Valley, Oahu
Toa Luau invites you to immerse yourself in the beauty and excitement of Polynesia on Oahu’s historic North Shore!...
Oahu: Chief's Luau Admission
Attend a luau on Oahu produced by the Original World Fire Knife Dance Champion, Chief Sielu. During this 3 to 3.5-...
Choose the Main Lens First

When the lights drop and the stage starts to glow, reach for your phone’s main 1x lens first. It usually has the biggest sensor and the widest native aperture, so you’ll get cleaner files with less noise in dim venues. That means brighter faces, richer shadows, and less muddy color in the smoke and neon. At Honolulu magic shows, review the phone photo policy before shooting, since phones and dedicated cameras may be treated differently. Skip the ultra-wide after dark. Avoid digital zoom too. Both trade detail for reach, and the loss shows fast under concert lights. If you need a wider frame, step back or leave room to crop later from the main lens. Shoot RAW if your phone allows it. You’ll keep more shadow detail and gain extra room to smooth noise and tune color afterward without turning the scene into mush.
Set Up Your Galaxy Camera
Start in Pro mode, and your Galaxy camera stops guessing and starts listening to you. Open the Camera app, switch to Manual mode, and take control of shutter speed, white balance, and focus. Begin with ISO settings around 400 to 800, then adjust by what you see on stage. Use slower speeds like 1/4 to 2 seconds for still scenes with a tripod, or 1/125 to 1/500 to freeze a singer mid-jump. Lock focus with AF-L, or use manual focus so bright spotlights don’t send your lens hunting like a confused tourist. Match white balance to the venue lights, around 3200K for tungsten. Shoot RAW or Pro RAW if your phone allows it, and bracket exposures by plus or minus 1 EV. Use a timer. Before you shoot, confirm the venue’s photo policy so your camera settings help you capture the show without breaking the rules.
Pick Night Mode or Pro Mode
When you’re shooting handheld in low light, Night Mode often saves the scene by stacking frames, cutting noise, and pulling detail from bright signs and dark corners, as long as you keep the phone steady and your subject doesn’t wander off. If you’ve got a tripod, Pro Mode gives you real control with a low ISO, a longer shutter, and locked white balance and focus so streetlights don’t turn your colors weird halfway through the shot. You’ll choose better photos when you match the mode to the moment: Night Mode for quick handheld results, Pro Mode for cleaner detail, RAW files, and a little more patience. If you’re photographing performances at one of Honolulu’s magic shows, these settings can help preserve stage lighting without blowing out highlights.
Night Mode Benefits
Often, Night Mode is your best bet for low-light show photos because it grabs several frames and stacks them into one cleaner image with less noise and better detail in bright stage lights and dark corners. You get smoother shadows, richer color, and more usable shots while staying handheld. Keep your elbows tucked and pause a beat so Multi-frames can align cleanly and avoid ghosting. To film a show without being annoying, keep that pause subtle and your phone low so you do not block anyone’s view.
| Feeling | What you see | Why it matters |
|---|---|---|
| Awe | Velvet dark seats, crisp neon beams | Your scene keeps depth |
| Relief | Faces stay clear, grain drops | You trust the moment |
That small bit of steadiness lets Night Mode turn a noisy blur into something that feels close to the music. Stage glow looks cinematic, and you still slip the phone back quickly.
Pro Mode Control
Switch gears and pick the mode that fits the scene. In Pro, or Manual, you take the wheel. Set shutter speed around 1/4 to 1/2 second for a singer who mostly stays put, then go faster if the guitarist starts flying. Keep ISO between 100 and 800 so shadows stay cleaner and colors don’t turn gritty. Lock focus on the performer or the front of the stage so your phone doesn’t hunt when lights flash. Dial white balance to the room’s glow, often 3200 to 4500K under warm stage lamps, for steadier skin tones. Underexpose a touch, about -0.3 to -1.0 EV, to save bright highlights. If motion matters, aim for 1/125 second or faster and accept a little noise over blur every time. If you’re seated in the front row, expect stronger light swings and more sudden movement, so be ready to adjust settings faster.
Still comparing Best Phone Settings For Low Light Show Photos?
Ask for tour ideas, hotel suggestions, or a simple trip plan that combines both.
Trip Helper
Choosing The Right Mode
Now pick the mode that matches the scene in front of you. If you’re shooting handheld, use Night Mode for static stage moments. It stacks multiple frames, cuts noise, and usually gives you cleaner photos without a tripod. Steady your phone on a rail, wall, or tiny tripod, then underexpose slightly, maybe minus 0.3 to 1.0 EV, to save bright highlights. If you’re heading to a Waikiki venue without a car, planning without driving can help you arrive early enough to stabilize your phone and choose the best shooting mode.
Switch to Pro/Manual mode when you have a tripod and want maximum detail. Set shutter speed around one to eight seconds and keep ISO low at 100 to 400. If performers move, stay in Pro mode, raise ISO to 800 or 1600, and use 1/125 to 1/500s. Lock white balance near 3200 to 4500K so colors don’t drift under warm stage lights tonight.
Stabilize Your Phone Before Shooting
Steady the phone before you shoot, and low-light scenes suddenly open up. Use a tripod or a tiny mount when you can. That lets you hold longer exposures while stage lights bloom instead of smear. If you are planning around a Honolulu magic show, arrive early enough to set your phone on a stable surface before the lights drop. To stabilize your phone without gear, brace it on a railing, speaker, or backpack, then use a 2 to 3 second timer.
| Move | Feeling |
|---|---|
| Tripod locked | Lights look calm |
| Timer and rail | Your hands stop meddling |
If contact shakes the frame, trigger with a Bluetooth remote or volume button. Turn stabilization on only as a backup. For long Night Mode captures, switch it off and trust the support. Handheld? Tuck elbows in, exhale, press gently, and hope for the beat to pause before the flash hits the room again.
Use ISO to Control Noise
You’ll get cleaner low-light shots if you keep ISO moderate, usually around 100 to 400 on a steady phone and 400 to 800 when you’re shooting handheld in a dim room or at a concert. Since ISO boosts the signal instead of adding light, you should raise shutter time first when your subject stays still and let stabilization do the quiet work. That way you balance grain and detail, so city lights stay crisp, faces keep their texture, and your photo doesn’t turn into a speckled midnight snack. Like magic shows, the best low-light photos preserve a sense of wonder by avoiding harsh settings that reveal more noise than detail.
Keep ISO Moderate
A good rule is to keep ISO in the moderate zone, usually around 100 to 800 on most phones, and use the lowest setting that still gives you a usable shutter speed. In low-light photography, think of ISO as an amplifier, not a magic fix. When you double it from 400 to 800, you gain brightness, but you also invite more speckled noise and softer detail in faces, fabrics, and stage haze. If your phone is steady on a rail or tripod, lower ISO helps shadows look smoother and richer. For handheld shots, 400 to 800 is often the sweet spot. Try not to leap to 1600 or higher unless you must. If you shoot RAW, moderate ISO also leaves you more shadow detail to recover. Since many Honolulu magic shows run long enough for changing stage light cues and dim audience moments, keeping ISO moderate gives you more consistent image quality throughout the performance.
Raise Shutter First
Once you’ve kept ISO in a sane range, the next move is to stretch shutter speed before you push sensitivity higher. Doubling exposure time gives you one more stop of light without adding sensor noise. Doubling ISO gives similar brightness, but noise rises with it.
If you’re handholding a phone, treat about 1/30 to 1/60s as the edge of comfort. Below that, brace on a rail, table, or tiny tripod. With stable support, try 1/4 to 2 seconds or longer and keep ISO around 100 to 800. For moving performers, start near 1/125 to 1/250s so faces and hands don’t smear, then raise ISO only as needed. For still stage scenes, let shutter speed run long. Night Mode or exposure stacking can help, too. Your phone likes patience. In Close-Up Magic, performers often work much nearer to the audience than in stage magic, so motion can feel more noticeable in your frame.
Balance Grain And Detail
Because stage light can look rich and moody one second and rough the next, ISO becomes your noise dial. Keep it around 400 to 800 when you can. That range usually holds detail in faces, velvet curtains, and smoky beams without turning shadows into grit. Remember, ISO controls how much noise you invite. Every jump upward adds grain fast, so don’t race to 1600 unless the moment truly demands it.
If your phone is steady on a tripod, stretch exposure time instead of boosting ISO. Longer frames keep color and tone cleaner. If you’re handheld or the singer won’t stop moving, bump ISO to 800 or 1200 so you can hit about 1/60 to 1/200s. Shoot RAW if possible, and bracket plus or minus 1 EV. Future you will smile. Before heading out, remember that essential items for a Waikiki magic show can also help you stay comfortable while waiting for the right low-light moment.
Use a Slower Shutter Safely
When the room goes dim, a slower shutter can pull in far more detail, but only if you keep the phone steady. Set your shutter-speed longer only when the scene is mostly still. A tripod, rail, or table lets you stretch to 1/4 to 2 seconds without mushy shake. In a Waikiki magic show, those steadier moments often come between illusions, when stage lighting holds long enough for a cleaner shot.
- Handheld, stay near 1/50 to 1/100s, or let Night Mode stack frames.
- If performers are moving fast, use 1/250 to 1/500s and bump ISO to 400 to 800.
- For creative blur or light trails, lock focus and white balance, then use a self-timer.
You’ll keep curtains crisp, neon signs smooth, and applause from turning your shot into abstract modern art. That tiny pause can reveal velvet seats, guitar gleam, and the hush before the chorus.
Adjust Exposure for Stage Lights
Watch the spotlight, then trim your exposure before it blows the singer’s face into a pale blur. Start with ISO around 400 to 800 so your phone balances sensitivity and noise while stage lights swing from dim blue wash to harsh white beams. Keep shutter speed near 1/125 to 1/250 when performers move fast under those roaming spots. If the frame still looks dark, raise ISO a little instead of letting highlights fry. Dial exposure compensation down by minus 0.3 to minus 1.0 EV to save skin tones and sequins from clipping. Then set white balance to match the dominant light, like 3200K for tungsten or 4500K to 5000K for mixed LEDs. Magicians rely on guided attention to control what people notice, and stage lighting can create a similar effect in your photos by pulling the eye toward the brightest part of the frame. Your RAW files will thank you later backstage tonight after the encore.
Lock Focus on the Performer
Tap into focus before the chorus hits, and put your point right on the performer’s face or chest so the camera doesn’t wander through murky air and bright beams. In dim venues, single-point AF gives you control and cuts down on hunting.
- Use AF-L or AE/AF lock focus once the singer looks sharp.
- Try face or eye detection if your phone tracks well through motion.
- Aim at a lit jacket patch first, then reframe when light is scarce.
Continuous autofocus can jump to a black backdrop or a stray spotlight, which is maddening. If you’re shooting Night Mode or long exposures, steady the phone on a rail or tripod after focus locks. Then disable autofocus so multi-frame capture doesn’t shift. Your shots stay crisp while the room throbs and the crowd sways around you. This matters even more during a Honolulu magic show, where theatrical lighting and sudden stage action can confuse your phone’s autofocus.
Match White Balance to Stage Color
Dial in your white balance before the lights start misbehaving. Use Manual Kelvin settings to match the stage color instead of trusting Auto. Tungsten spots usually sit around 2800 to 3200K, while LED washes often land between 4000 and 6500K. When warm follow spots collide with cool backlights, split the difference at about 4200 to 4800K. If you can, sample a grey card or even a plain white set piece with your phone’s custom eyedropper under the same light. That gives you a solid baseline before the singer hits the first note. This matters even more at a Waikiki magic show, where mixed theatrical lighting can shift fast from warm spotlights to cool stage washes. You can nudge white balance warmer or cooler by 300 to 600K to keep the room’s mood intact. Jot down the setting so your shots stay consistent through the set tonight.
Shoot RAW for Cleaner Edits
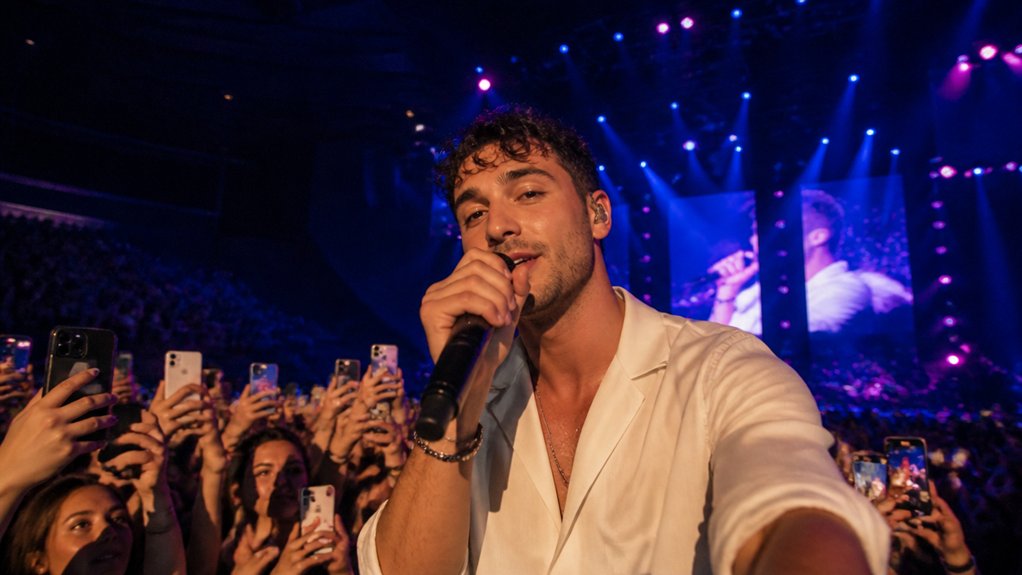
When you shoot RAW on your phone, you keep more shadow detail in dark corners and bright highlights on stage, so your edits don’t fall apart later. You also get more room to fine-tune color, which helps when club lights turn skin orange or blue like a late-night neon sign. Pair RAW with a steady hand and a low ISO, and you’ll give yourself a cleaner file that handles noise reduction with far less fuss. Just like simple magic tricks rely on clean, controlled moves to impress kids after the show, RAW gives you more control over the final image in tricky lighting.
Preserve Shadow Detail
If you want low-light photos that keep the mood instead of turning shadows into mush, shoot RAW or DNG whenever your phone allows it. Shoot RAW gives you about 2 to 3 extra stops of recoverable shadow detail on many phones, so dark corners stay textured instead of muddy. If you’re photographing performances with varying start times, check the schedule ahead of time so you can prep your RAW settings before the lights go down.
- Lower ISO to 100 to 400 and steady your phone so shadows stay cleaner
- Underexpose by 0.3 to 0.7 EV to protect bright stage lights
- Lock white balance and manual focus before longer exposures
You can also bracket exposures, or grab one extra underexposed RAW frame just for the shadows. Later, you can blend it in and keep black jackets, smoky air, and dim venue walls looking real, not like charcoal soup after the show.
Improve Color Flexibility
Start by switching on RAW or DNG in your phone’s Pro or Manual mode, and your low-light shots instantly give you more room to breathe in editing. RAW (DNG) keeps richer color, up to 12 to 14 stops of shadow detail, and far more white balance flexibility under tricky tungsten and neon. This matters even more during live performances, since language barriers do not stop a visual show from working, but they can make accurate color and mood carry more of the storytelling.
| Setting | Try | Why |
|---|---|---|
| Format | RAW | Richer color |
| ISO | 400–800 | Cleaner channels |
| WB | Lock custom | Steady starting point |
| Shutter | Longer, stable | Better color fidelity |
If lights mix wildly, note the Kelvin setting on scene. That gives your edit a reliable anchor later. You’ll pull back odd tints, keep skin tones believable, and hold onto the mood of the room, not the phone’s guess when concerts flash like a restless little lighthouse at midnight.
Enable Better Noise Reduction
Because low light loves to sprinkle grit into shadows, RAW or DNG is your best defense for cleaner edits later. Turn on RAW (DNG) in your phone’s Pro or Camera settings so every frame keeps more shadow detail and richer color for stronger noise reduction afterward.
- Keep ISO around 100 to 800 when possible.
- Use a tripod or steady ledge for 1 to 8 second exposures.
- Bracket RAW shots at plus or minus 1 to 2 EV.
You’ll get cleaner base files and less blotchy color in dark corners. If the stage lights flicker and the room hums, don’t panic. Let shutter speed do more work than ISO. In editing, apply noise reduction first, especially in shadows and chroma noise, then sharpen gently so grain doesn’t crash the party.
Bracket Only Static Night Scenes
Anchor your phone on a tripod or any rigid support, then bracket only scenes that hold still, like a quiet street, a lit church facade, or a skyline that seems frozen in the dark. Switch to RAW so each frame keeps shadow detail for blending later. When you bracket exposures, keep ISO steady at 100 to 400 and change shutter speed instead across a 2 to 3 stop range, such as base, +1 EV, and -1 EV. Lock focus and white balance before you start so the phone doesn’t hunt or tint one frame warmer than the next. Use a remote release or a 2 to 3 second timer. Keep the longest exposure 1 to 8 seconds, depending on the scene and phone stability. If you’re shooting after arriving downtown for an evening event, plan ahead for Honolulu Magic Show parking so you can set up your tripod without rushing.
Handle Motion in Low Light

In low light, you get to choose the story: freeze a singer mid-step with a faster shutter, or let the scene streak into glowing motion with a longer exposure. If you want crisp detail, steady your phone on a tripod, railing, or café table and keep your exposure under control. You’ll quickly notice how a sharp face, a blurred hand, or a ribbon of light can change the whole mood. If you’re planning to practice at a performance, knowing the best time to book a Honolulu magic show can help you choose a show that fits your low-light photo goals.
Freeze Or Blur
Decide what you want the motion to do before you tap the shutter, since low light turns every step, spin, and waving hand into a choice. To freeze dancers, push shutter speed to 1/125 to 1/500 and raise ISO only as much as needed.
- Freeze faces and jumps with burst mode
- Blur lights with 1/4 to 2 second exposures
- Skip Night Mode if movement starts smearing
When action changes fast, try 1/60 to 1/125 as a middle ground. Keep ISO around 800 to 3200 for freezing, or 100 to 400 for blur. Shoot RAW or bracket exposures so you can rescue detail later and pick the frame where the music feels visible in a sharp hand, a bright sleeve, or a clean turn that sings.
Stabilize For Sharpness
Steady the phone, and low light starts working with you instead of against you. A Small tripod or phone clamp lets you shoot at 1/15s or slower without camera shake, so ISO can stay around 100 to 800 and your shadows look cleaner. No tripod? Rest your phone on a ledge, rail, or backpack, then use a 2 to 3 second timer or remote shutter. That tiny pause kills tap blur. For handheld shots, tuck in your elbows, grip with both hands, exhale, and press gently, or use the volume button. You can hold about 1/30s this way. Turn on stabilization help, including OIS or Night Mode prompts, and keep the frame still during stacking. For moving subjects, raise shutter speed first, then ISO if needed.
Reduce Noise Without Plastic Skin
When the light gets thin and the room starts to glow with bright signs or hard stage spots, you don’t need to smear away every speck of grain to get a clean photo.
In thin light and neon glare, a clean photo comes from restraint, not scrubbing every trace of grain away.
- Shoot RAW and keep ISO near 400, or 100 to 800, so noise stays fine and details survive editing.
- Use the main 1x lens and a tripod or firm ledge. A longer exposure beats cranking ISO and keeps skin texture real.
- Dial in minus 0.3 to 0.7 EV for stage lights, then lift shadows later. Reduce noise softly on skin and dark areas, then add targeted sharpening for pores, fabric, and hair.
That way, faces keep character, curtains hold texture, and neon edges stay crisp instead of turning waxy under edits.
Avoid Common Night Photo Mistakes
Even if the street looks calm and the lights feel generous, night photos can fall apart fast if your phone makes a few bad guesses. For cleaner Low-light photos, keep ISO around 100 to 800, and only push higher when you must freeze movement. A tripod, ledge, or railing helps more than a noisy sensor, especially with a 2 to 3 second timer.
Before you shoot, lock focus or use single-point AF so your phone doesn’t hunt in the dark like it lost its keys. If bright stage lights flare, dial exposure down by 0.3 to 0.7 EV to save highlights. Shoot RAW when you can, and bracket by plus or minus 1 EV. You’ll keep detail, dodge blur, and give editing room later too.
Frequently Asked Questions
Can I Use an External Clip-On Lens for Concert Photography?
Yes, you can use an external clip on magnifier or anamorphic adapter for concert photography, but you’ll get brighter shots with your phone’s main 1x lens unless you test alignment, sharpness, and light loss first.
Which File Format Is Best for Sharing Low-Light Show Photos Online?
Choose high-quality JPEGs for most online sharing; you’ll get broad support, detail, and manageable sizes. Keep JPEG quality around 80–90, use sRGB, and only pick WebP when you know the platform’s WebP compatibility is reliable.
How Do Venue Rules Affect Phone Photography at Live Shows?
Venue rules shape your phone photography like velvet ropes guiding light: you can’t use flash, bulky gear, or banned supports, and you must protect audience sightlines, obey recording policies, and respect any temporary phones-off moments.
What Accessories Help Most for Low-Light Phone Photography?
Choose tripod adapters,wireless remotes, a sturdy mini tripod, and a compact LED light first; you’ll steady long exposures, avoid shake, add fill, and keep shooting with a power bank when night modes drain batteries fast.
How Can I Protect Battery Life During Long Nighttime Performances?
Guard your battery like a candle in the dark: dim brightness, kill background apps, use Airplane Mode, switch on Battery saver, disable Always-On Display, and keep a fast-charging Power bank ready between sets all night.
Conclusion
Low light doesn’t have to flatten the magic. You can keep the velvet dark, the stage glow, and the quick flash of a singer’s hand if you start with the main lens, steady your phone, and choose settings on purpose. Here’s the hook: phone sensors can collect up to four times more light with pixel binning in night scenes. That’s a real edge. Use it well, and your next show shot can look crisp, moody, and alive.